
By Joseph Dahut
Picture this, you are stuck in your office dreaming of warmer, exotic destinations teeming with healthy populations of wild, beautiful fish. Can you remember when the only thing you had to worry about was not dropping your cell phone into crystal clear water? Sounds pretty nice right about now, especially in the tight grip of winter that so many of us are struggling with.
The flats are calling your name, and whether you are stuck on your lunch break or at home on a snow day, try whipping up something new, crafty, and reminiscent of your bucket list vacation. This Craft Store Crab pattern is a fly I drafted to combat the expensive crab patterns that often float around in fly shops. This fly’s materials are compiled mostly from craft store purchases or household items, and can be bought in bulk for cheap. Some of the materials, such as the hook and the eyes are not to be purchased at a craft store, but because you are reading this article, I assume you have access to these fairly universal saltwater tying materials.
The first step to tying this fly is running to any craft store by you. Michael’s is the store that happens to be most convenient for me, but many stores make these basic materials readily available. Some of these items may be stashed somewhere in your house, convenience store, or fly tying boxes – don’t be afraid to take a look, there’s only a few materials.
Materials:
Hook – Saltwater Size 2-4
Thread – Heavy Brown
Dumbbell Eyes – Small/Medium (Gold)
Twine Rope – Dark Brown
Markers – Green & Black
Super Glue
Felt Square – Tan/Dark Brown/Olive
Step One:
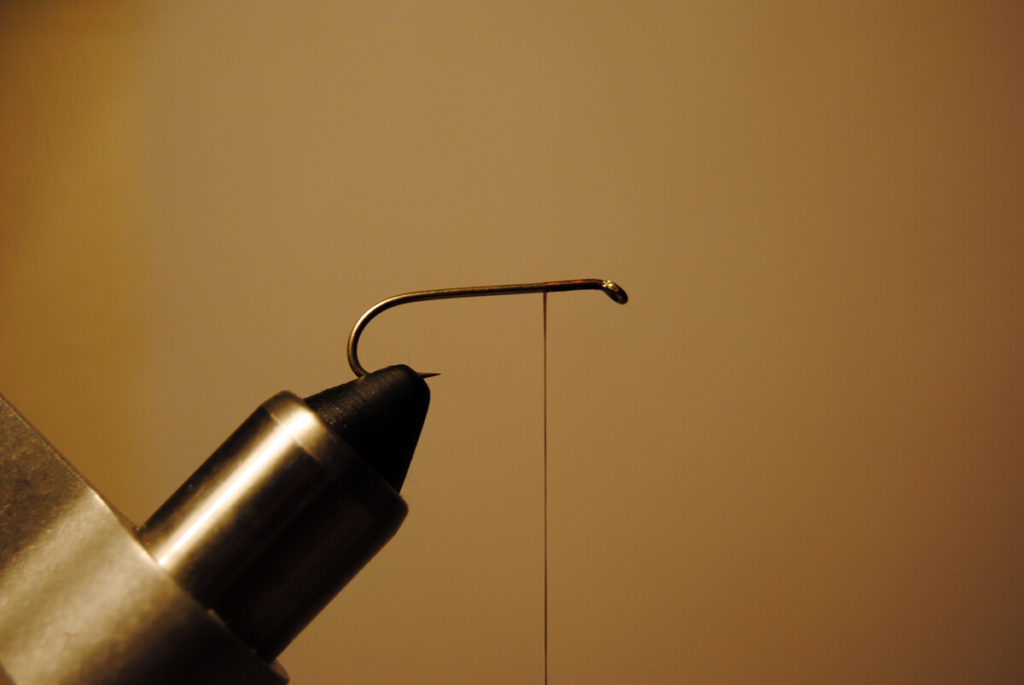
Wrap your thread one quarter of the way down the hook shank.
Step Two:
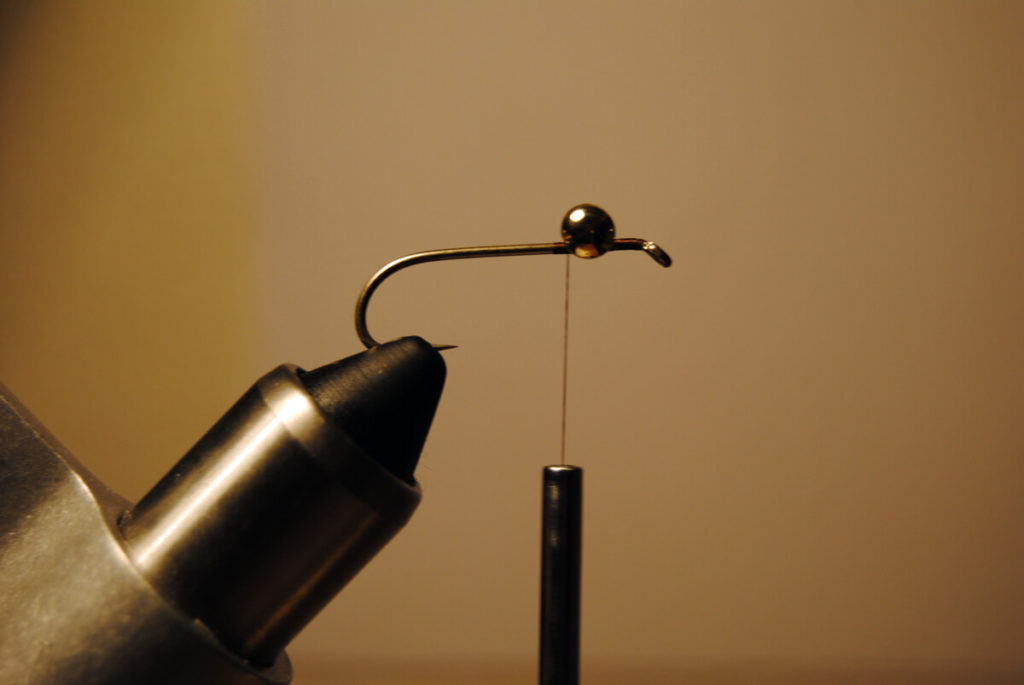
Secure the dumbbell eyes with tight thread wraps that put the eyes in place. Mix in figure eight wraps to ensure that the eyes don’t move. This will provide weight for the fly, and drop it to the mouths of the feeding bonefish you’ve been eyeing from the edge of the skiff.
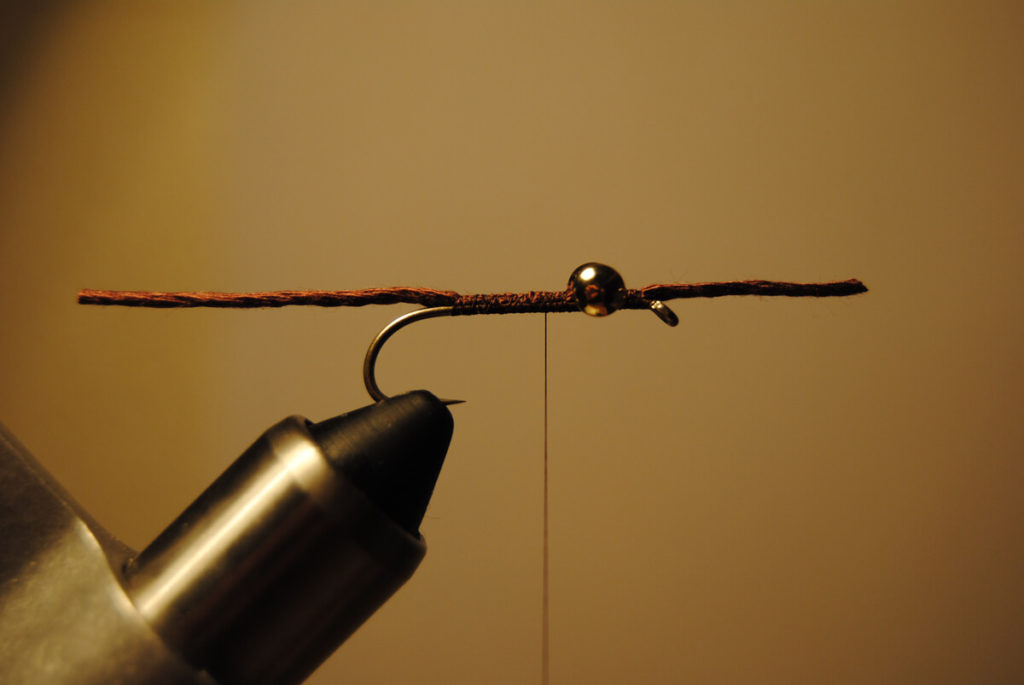
Step Three:
 \
\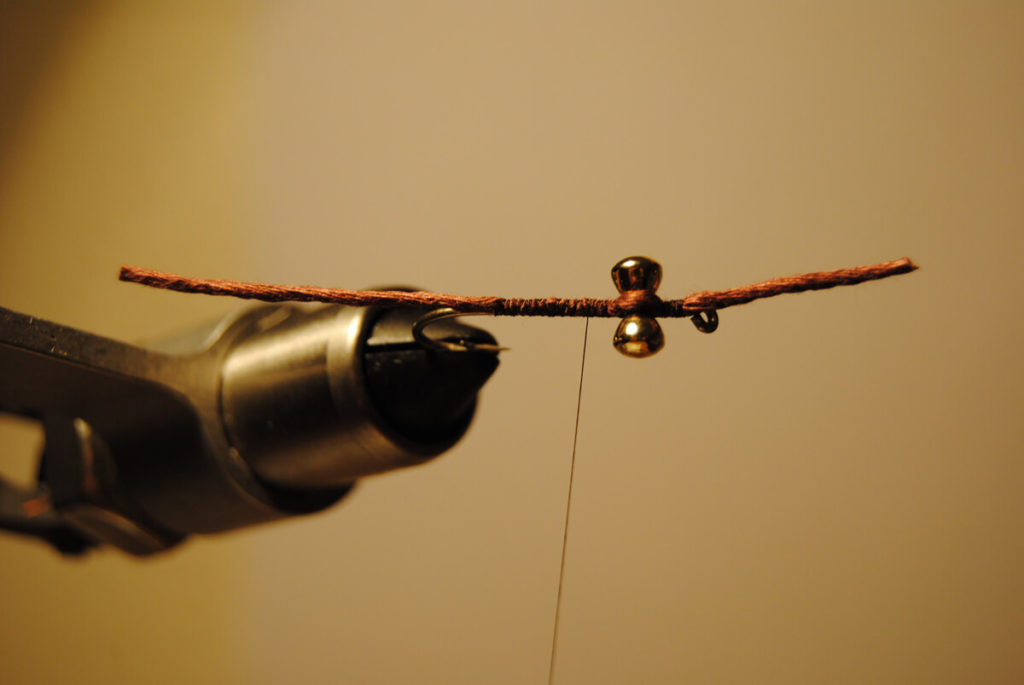
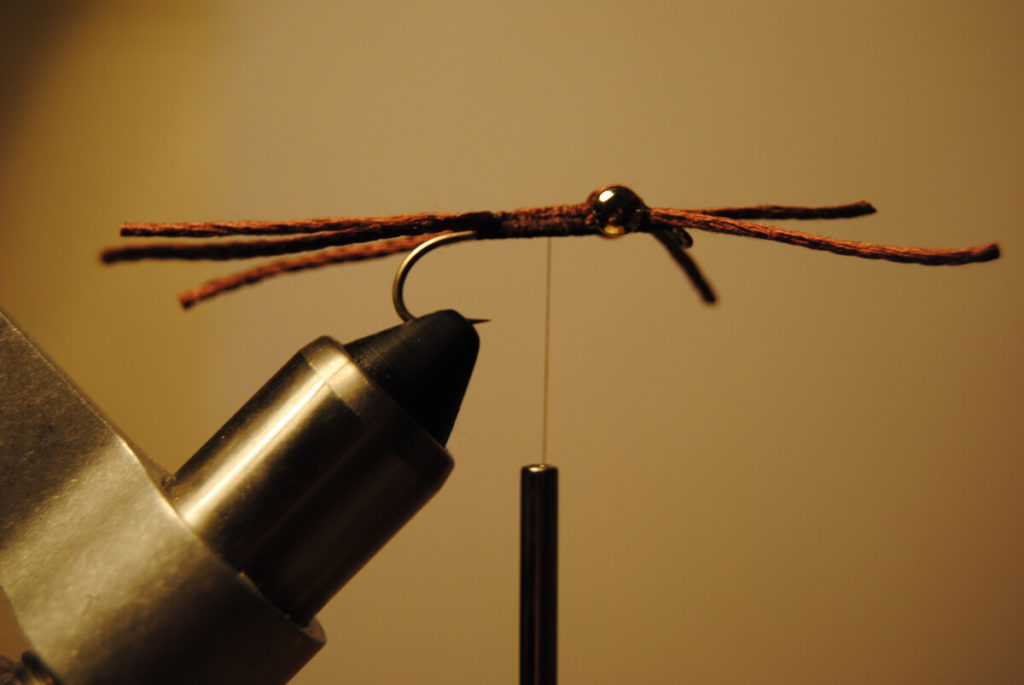
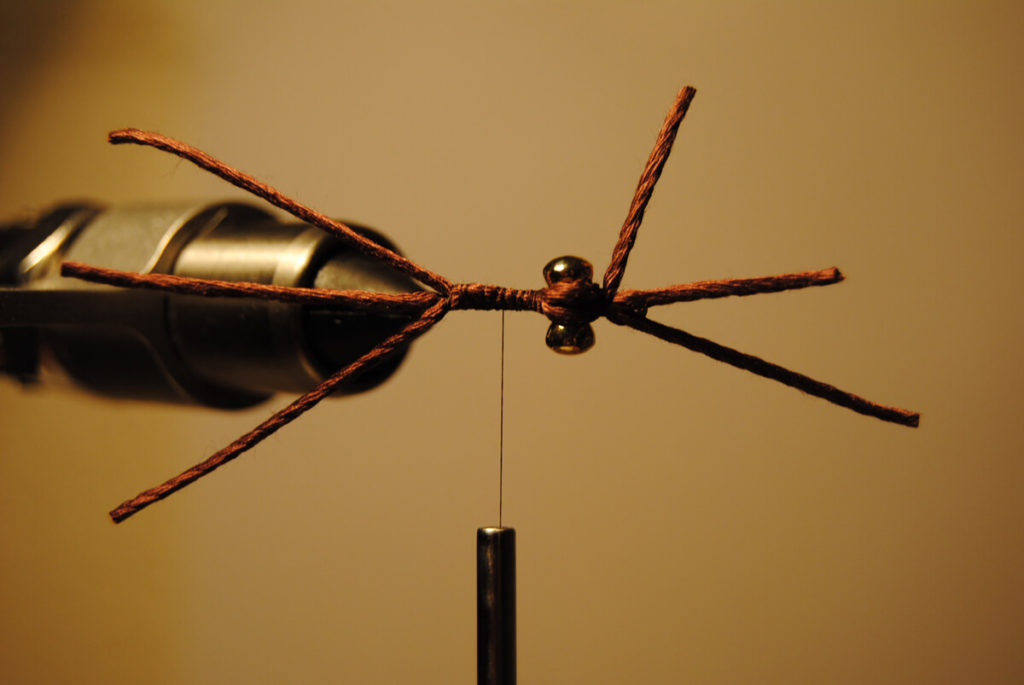
Cut three pieces of twine, chenille, or any other ropey, dark-hued material that can act as legs. Wrap one leg that parallels the hook shank, and have the other two create an X that goes across the body of the fly. It is important to remember to make the legs longer than you expect – you can always trim the legs, you can’t add more material once you are done.
Step Four:
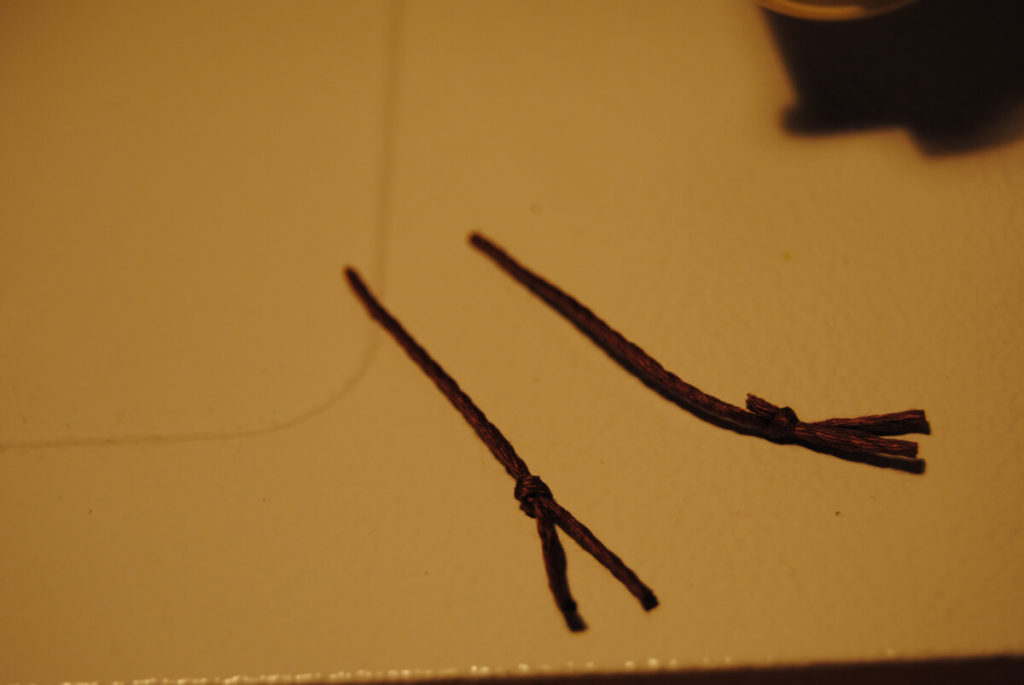
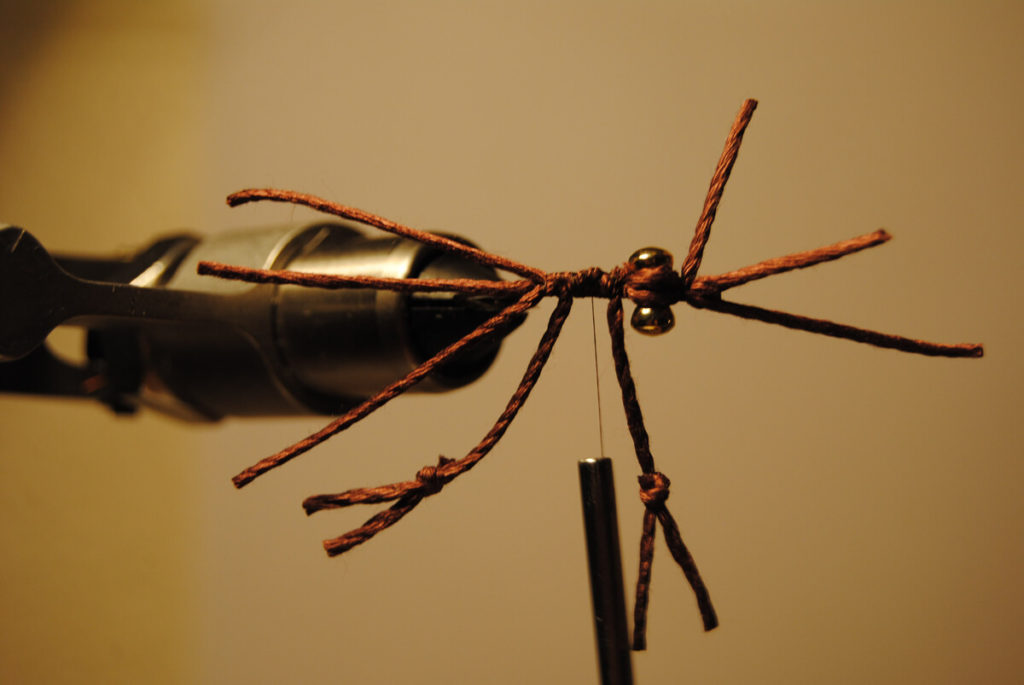
In order to fashion the claws for this pattern, you must take a longer piece of whatever material you use for your legs and tie a non slip loop knot, or a Kreh Knot, and leave plenty of room for the claws to poke out in front of the felt body. Tie on the claws, using tight wraps to secure them to the body. Whip finish this fly and add a dot of glue to your finish. From this point on, you will only need glue.
Step Five:
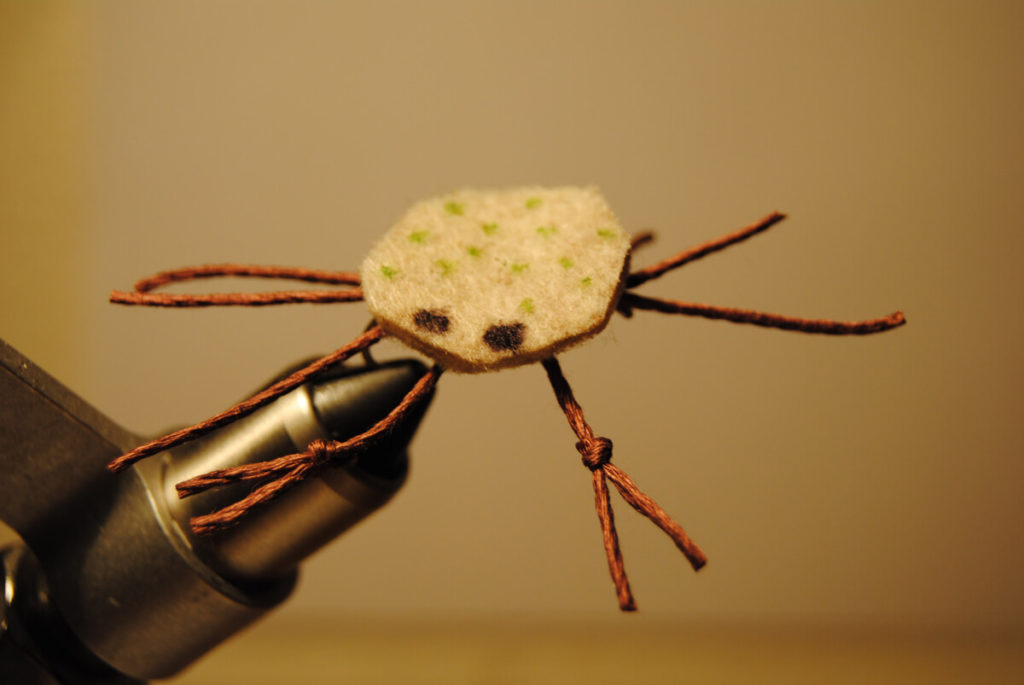
Cut your felt squares to a proportional size to your hook and the crab’s legs. In my model, I cut and shaped two pieces of tan felt the size of a quarter, gluing them together to make a thicker body for the crab. After dotting the top of the body with your desired details (use a permanent marker or paint to detail the top shell with eyes, dots, and any other desired detail), adhere the felt body to the hook and legs you have worked on.
Step Six:
Trim the legs and claws to match the proportions of the hook and body. Consider this step the finishing touches of the fly. Add more glue where it needs to be applied, trim up the claws or legs, and add details with a marker if your crab lacks personality.
Step Seven:
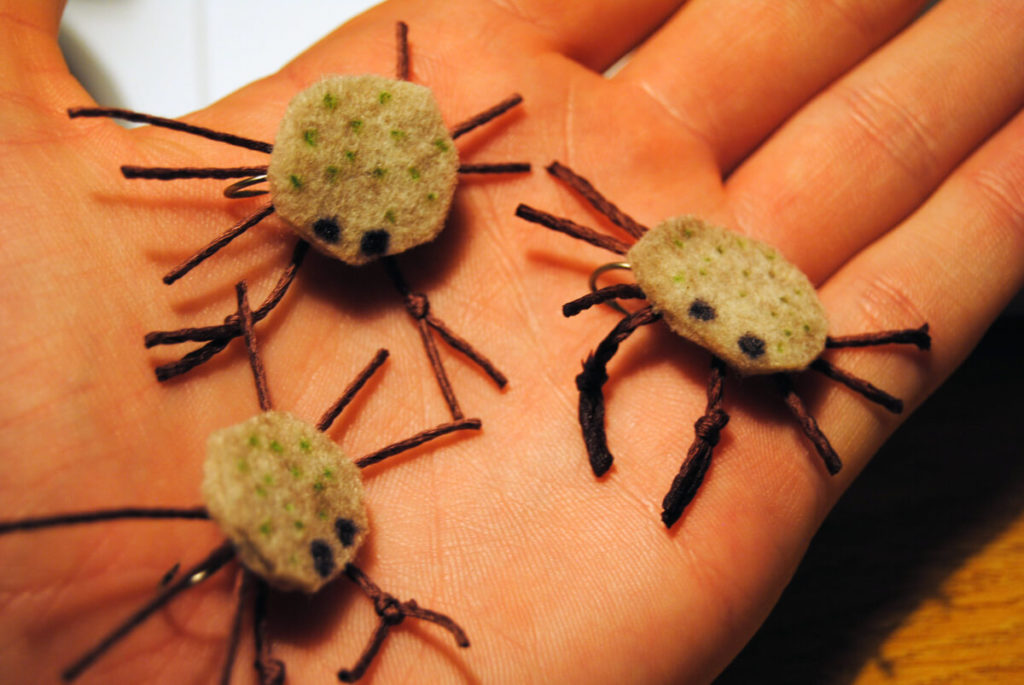
Get out there and get into some fish!
You have completed your first Craft Store Crab, a pattern that will bust any slump on the flats or oceans you are fishing. This pattern imitates a range of crab species, and the mind-blowingly simple foundation of the pattern is intentional, making it easy for any angler to match their local crab hatch depending on the fishery they are exploring. Do not be afraid to tweak this fly, totally change it, or even add your own personal touch to it like premade plastic eyes which is a popular modification.
Tight lines!
Other fly tying blog posts:
Redfish Crab Fly
Clouser Minnow
Characteristics of Great Bonefish Flies

I’m all about craft store materials. But I have found the hardware store have some useful materials as well.
I like those little felt pads that are used to stick on the bottom of chair legs for my crab bodies. Here on Turneffe Island the crabs are relatively small. So the small size pads are perfect.
I use a green marker to color them.
Tight Lines!
Michael Herrick
Director of Fishing
Turneffe Island Resort
Belize
Hi Michael,
Great tip! We like those little pads as well and “fortify” them with epoxy sometimes.
You should do a fly tying step by step for one of your more popular permit crab patterns.
What do you think?
Will do, but later as we are busy here.
Note…as Will Bauer pioneered the smallercrab patterns here in Belize (nickle and dime size) I recently turned over coral rocks out on the Flats and found this to be true and a blend of olive and tan in colors.
Also and finally the crabs move sideways so it’s important to fashion the claws on the side of the pattern.